1. 버킷 생성 [ shinbucket1010 ]
➜ 기본 암호화 : 다 default
➜ 버킷 정책 편집
✅ 정책 생성기 접속
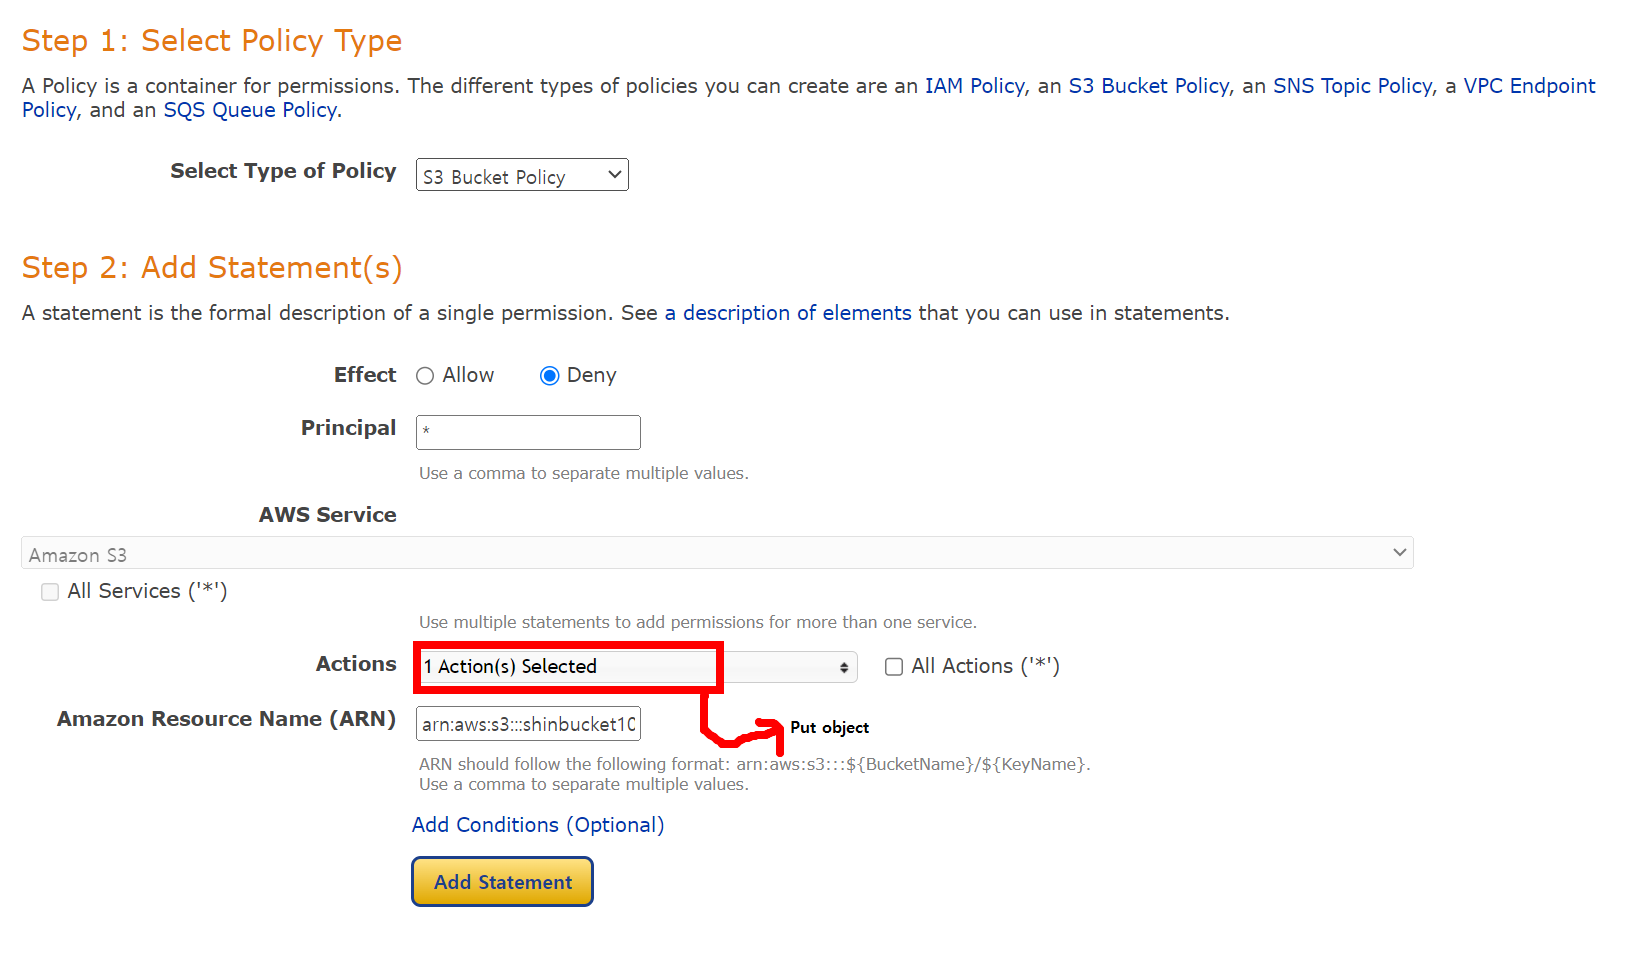

✅ condition : string not equal = 지정된 값과 같지 않을 때 동작
✅ key : s3:x3-amz-server-side-encryption → 이 키는 S3 객체를 업로드 할 때 사용하는 서버 측 암호화 옵션
✅ value : aws:kms
→ 이 설정은 S3에 객체를 업로드할 때, 서버 측 암호화 방식으로 AWS KMS를 사용하지 않으면 [ 즉, x-amz-server-side-encryption 헤더의 값이 aws:kms와 다를 때 ] 해당 정책이 적용된다는 의미
→ 보통 이 조건은 KMS를 사용하지 않는 업로드를 금지하거나 제한하기 위해 설정 [ 즉, 이 조건에 의해: KMS를 사용하지 않고 업로드된 파일은 정책에 의해 허용되지 않거나 거부될 수 있음 ]
➜ Policy Document > 변경사항 저장
{
  "Id": "Policy1728542769532",
  "Version": "2012-10-17",
  "Statement": [
    {
      "Sid": "Stmt1728542757760",
      "Action": [
        "s3:PutObject"
      ],
      "Effect": "Deny",
      "Resource": "arn:aws:s3:::shinbucket1010/*",
      "Condition": {
        "StringNotEquals": {
          "s3:x-amz-server-side-encryption": "aws:kms"
        }
      },
      "Principal": "*"
    }
  ]
}
➜ 버킷 하나 더 만들기 [ shintest1010 ]
{
  "Id": "Policy1728543109474",
  "Version": "2012-10-17",
  "Statement": [
    {
      "Sid": "Stmt1728543070052",
      "Action": [
        "s3:PutObject"
      ],
      "Effect": "Deny",
      "Resource": "arn:aws:s3:::shintest1010/*",
      "Condition": {
        "StringNotEquals": {
          "s3:x-amz-server-side-encryption": "aws:kms"
        }
      },
      "Principal": "*"
    }
  ]
}

➜ 파일 업로드 [ shinbucket1010 ]
✅ 파일 업로드
✅ 속성, 키는 default로 다 설정, 키 ARN 복사 후 AWS KMS 키 ARN에 붙여넣기
✅ 키 삭제는 비활성화 > 키 삭제 [ 최소 7일 걸림 ]

2. S3 생성
➜ source-bucket 버킷 생성, 기본 암호화 비활성화, 모든 퍼블릭 액세스 허용
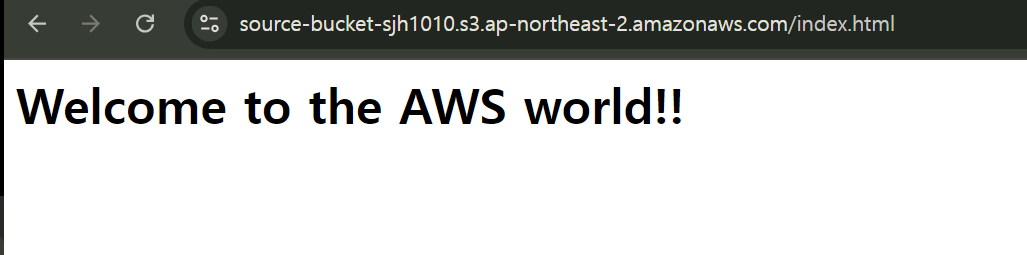
✅ 정적 웹호스팅 : index.html
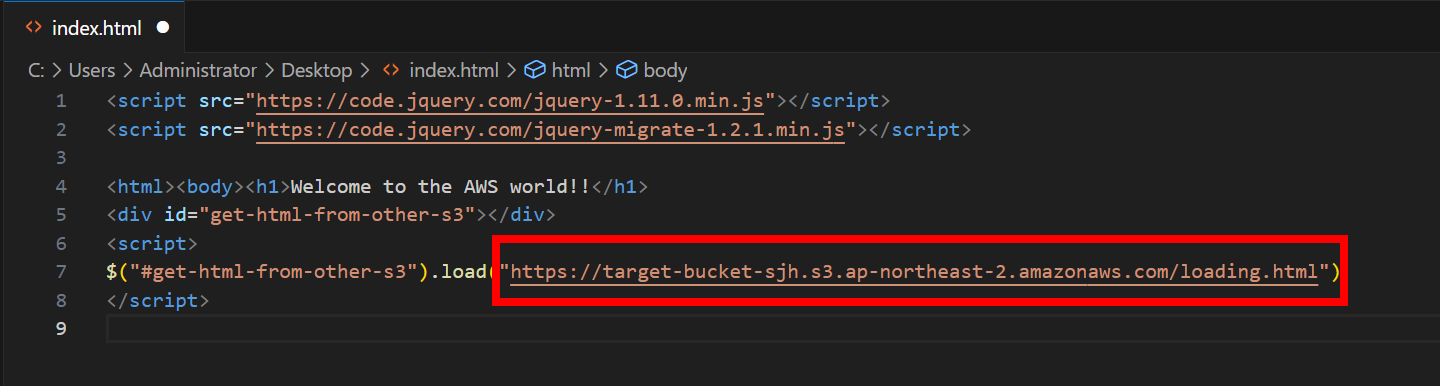
✅ index.html 업로드
<script src="https://code.jquery.com/jquery-1.11.0.min.js"></script>
<script src="https://code.jquery.com/jquery-migrate-1.2.1.min.js"></script>

<html><body><h1>Welcome to the AWS world!!</h1>
<div id="get-html-from-other-s3"></div>
<script>
$("#get-html-from-other-s3").load("loading.html")
</script>
➜ target-bucket 버킷 생성, 기본 암호화 비활성화, 모든 퍼블릭 액세스 허용
✅ 정적 웹호스팅 활성화 : index.html
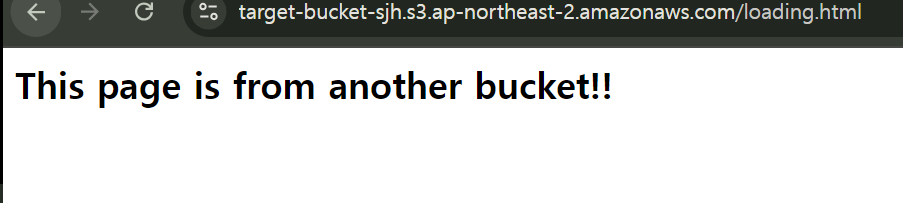
✅ loding.html 업로드
<h2>This page is from another bucket!!</h2></body></html>
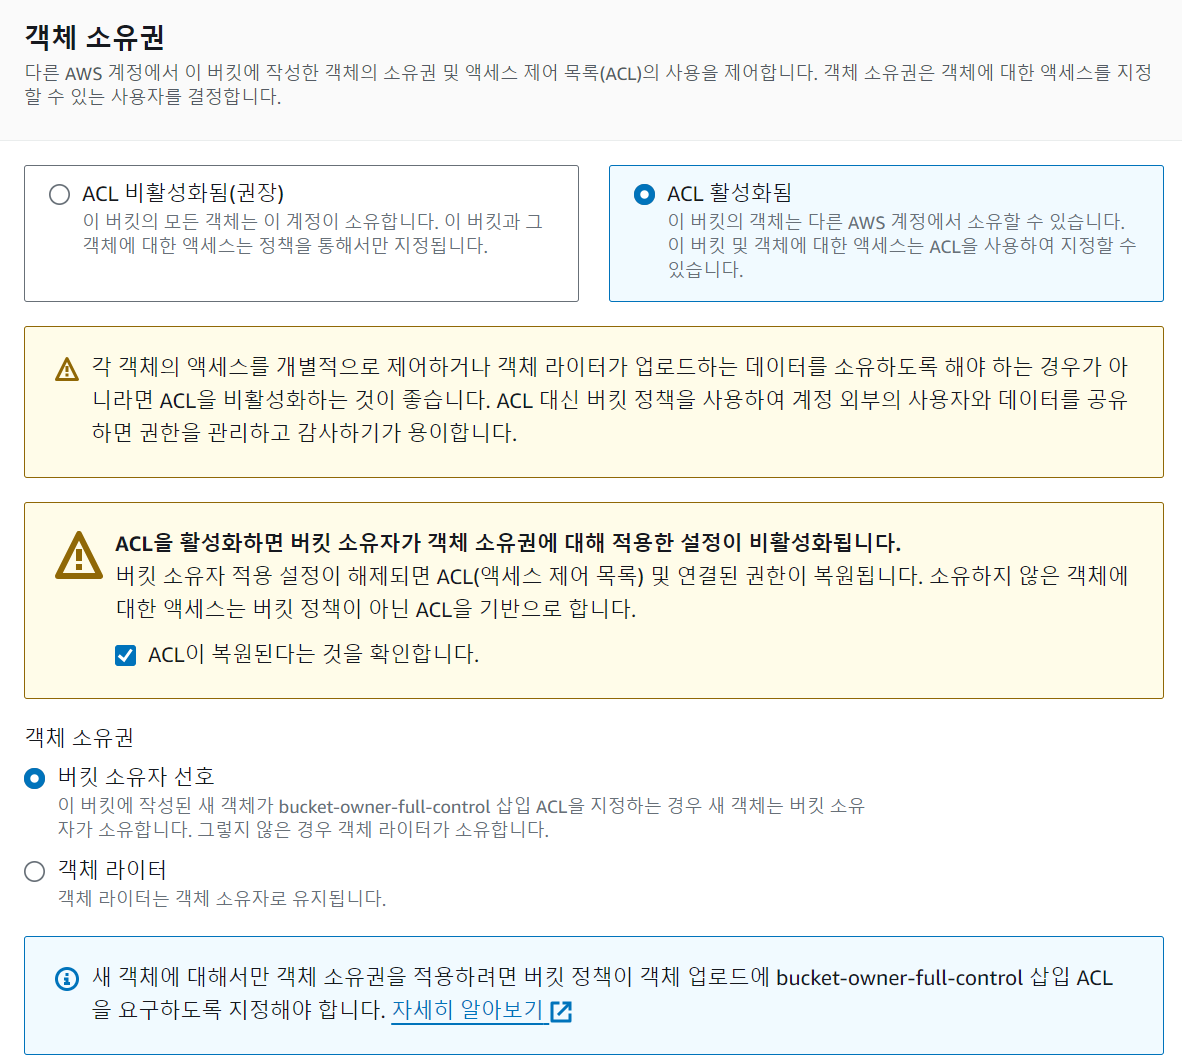
✅ 객체 소유권 편집
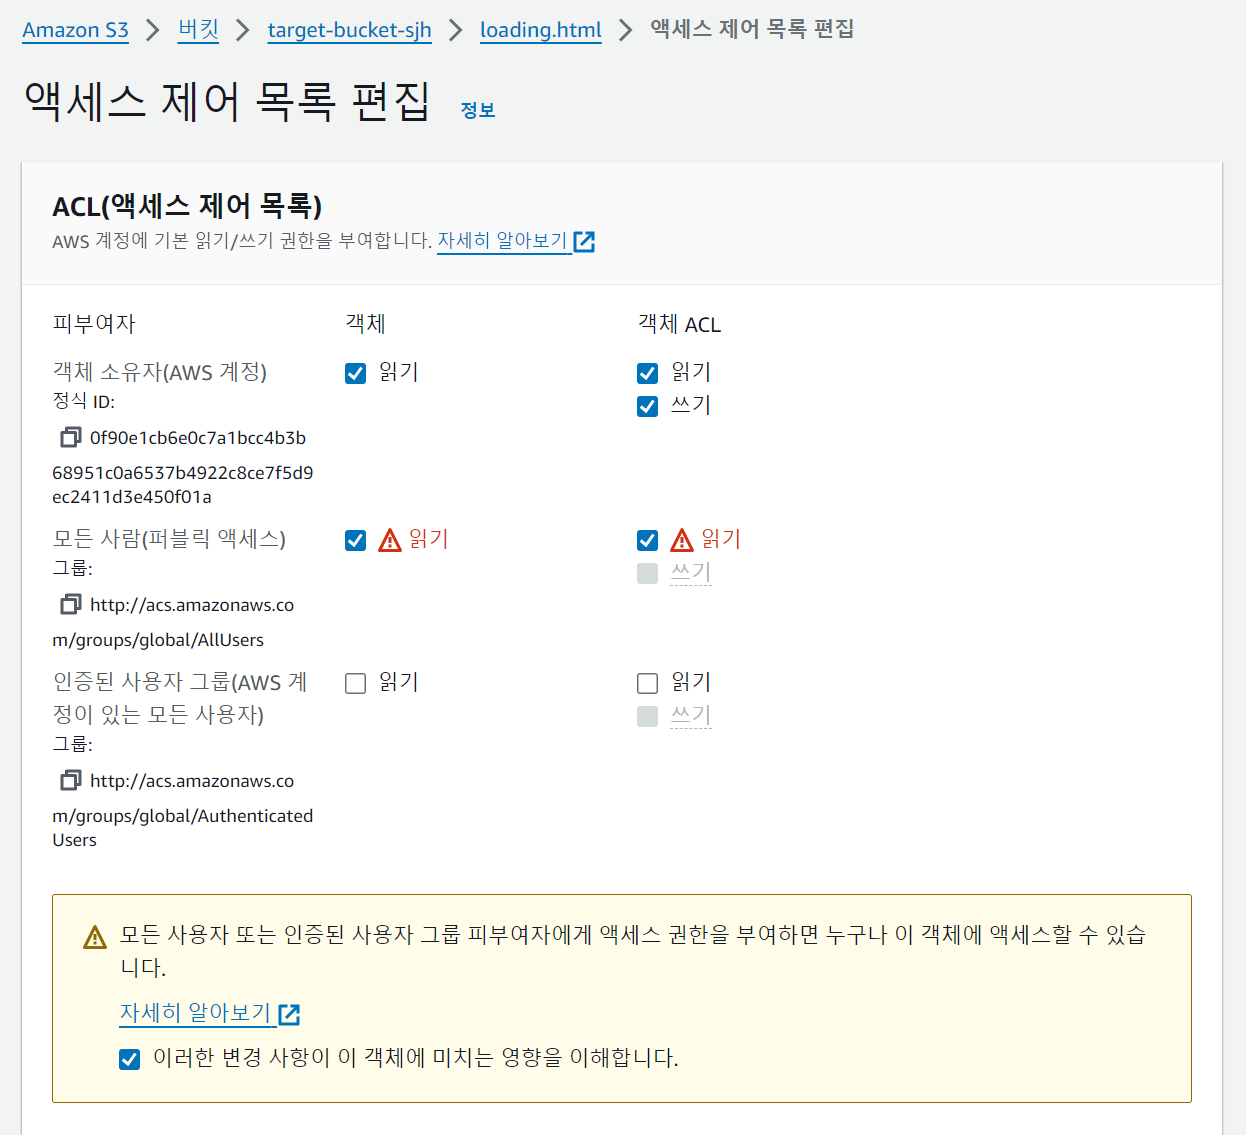
✅ ACL(액세스 제어 목록) 편집

✅ loding.html 편집
✅ 접속 : http://target-bucket-sjh.s3-website.ap-northeast-2.amazonaws.com
✅ index.html 수정 : loading.html url 복사
✅ 다시 index.html 업로드, 권한 다시 다 변경
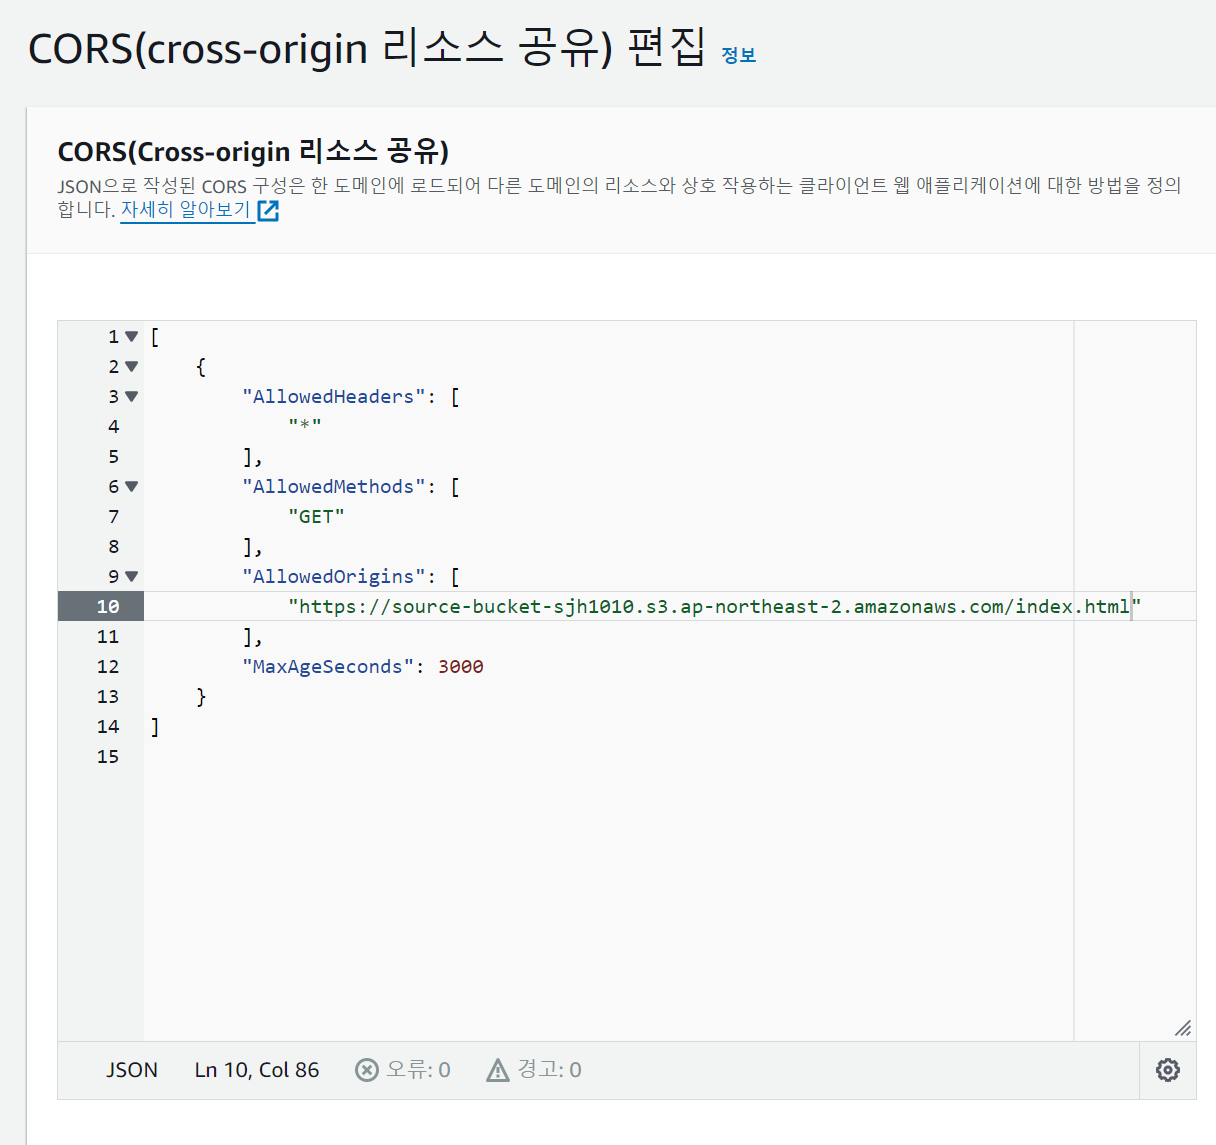
➜ CORS ""에 index.html url 복붙1. 버킷 생성 [ shinbucket1010 ]
➜ 기본 암호화 : 다 default
➜ 버킷 정책 편집
✅ 정책 생성기 접속


✅ condition : string not equal = 지정된 값과 같지 않을 때 동작
✅ key : s3:x3-amz-server-side-encryption → 이 키는 S3 객체를 업로드 할 때 사용하는 서버 측 암호화 옵션
✅ value : aws:kms
→ 이 설정은 S3에 객체를 업로드할 때, 서버 측 암호화 방식으로 AWS KMS를 사용하지 않으면 [ 즉, x-amz-server-side-encryption 헤더의 값이 aws:kms와 다를 때 ] 해당 정책이 적용된다는 의미
→ 보통 이 조건은 KMS를 사용하지 않는 업로드를 금지하거나 제한하기 위해 설정 [ 즉, 이 조건에 의해: KMS를 사용하지 않고 업로드된 파일은 정책에 의해 허용되지 않거나 거부될 수 있음 ]
➜ Policy Document > 변경사항 저장
{
"Id": "Policy1728542769532",
"Version": "2012-10-17",
"Statement": [
{
"Sid": "Stmt1728542757760",
"Action": [
"s3:PutObject"
],
"Effect": "Deny",
"Resource": "arn:aws:s3:::shinbucket1010/*",
"Condition": {
"StringNotEquals": {
"s3:x-amz-server-side-encryption": "aws:kms"
}
},
"Principal": "*"
}
]
}
➜ 버킷 하나 더 만들기 [ shintest1010 ]
{
"Id": "Policy1728543109474",
"Version": "2012-10-17",
"Statement": [
{
"Sid": "Stmt1728543070052",
"Action": [
"s3:PutObject"
],
"Effect": "Deny",
"Resource": "arn:aws:s3:::shintest1010/*",
"Condition": {
"StringNotEquals": {
"s3:x-amz-server-side-encryption": "aws:kms"
}
},
"Principal": "*"
}
]
}

➜ 파일 업로드 [ shinbucket1010 ]
✅ 파일 업로드
✅ 속성, 키는 default로 다 설정, 키 ARN 복사 후 AWS KMS 키 ARN에 붙여넣기
✅ 키 삭제는 비활성화 > 키 삭제 [ 최소 7일 걸림 ]

2. S3 생성
➜ source-bucket 버킷 생성, 기본 암호화 비활성화, 모든 퍼블릭 액세스 허용
✅ 정적 웹호스팅 : index.html
✅ index.html 업로드
<script src="https://code.jquery.com/jquery-1.11.0.min.js"></script>
<script src="https://code.jquery.com/jquery-migrate-1.2.1.min.js"></script>
<html><body><h1>Welcome to the AWS world!!</h1>
<div id="get-html-from-other-s3"></div>
<script>
$("#get-html-from-other-s3").load("loading.html")
</script>
➜ target-bucket 버킷 생성, 기본 암호화 비활성화, 모든 퍼블릭 액세스 허용
✅ 정적 웹호스팅 활성화 : index.html
✅ loding.html 업로드
<h2>This page is from another bucket!!</h2></body></html>
[
{
"AllowedHeaders": [
"*"
],
"AllowedMethods": [
"GET"
],
"AllowedOrigins": [
"*"
],
"MaxAgeSeconds": 3000
}
]
✅ 객체 소유권 편집

✅ ACL(액세스 제어 목록) 편집

✅ loding.html 편집

✅ 접속 : http://target-bucket-sjh.s3-website.ap-northeast-2.amazonaws.com
✅ index.html 수정 : loading.html url 복사

✅ 다시 index.html 업로드, 권한 다시 다 변경
➜ CORS ""에 index.html url 복붙
2. 결과 확인
'AWS' 카테고리의 다른 글
| [ 16 ] - dynamoDB에 데이터 넣기 (0) | 2024.10.14 |
|---|---|
| [ 15 ] - key (0) | 2024.10.11 |
| [ 14 ] - 보안 모니터링 (0) | 2024.10.10 |
| [ 13 ] - Karpenter 모니터링 (0) | 2024.10.08 |
| [ 12 ] - karpenter 배포 (0) | 2024.10.07 |